Epson R2000 Schnellstart Anleitung
Stöbern Sie online oder laden Sie Schnellstart Anleitung nach Drucken & Scannen Epson R2000 herunter. Epson R2000 Start Here Guide [en] Benutzerhandbuch
- Seite / 4
- Inhaltsverzeichnis
- LESEZEICHEN
Inhaltsverzeichnis
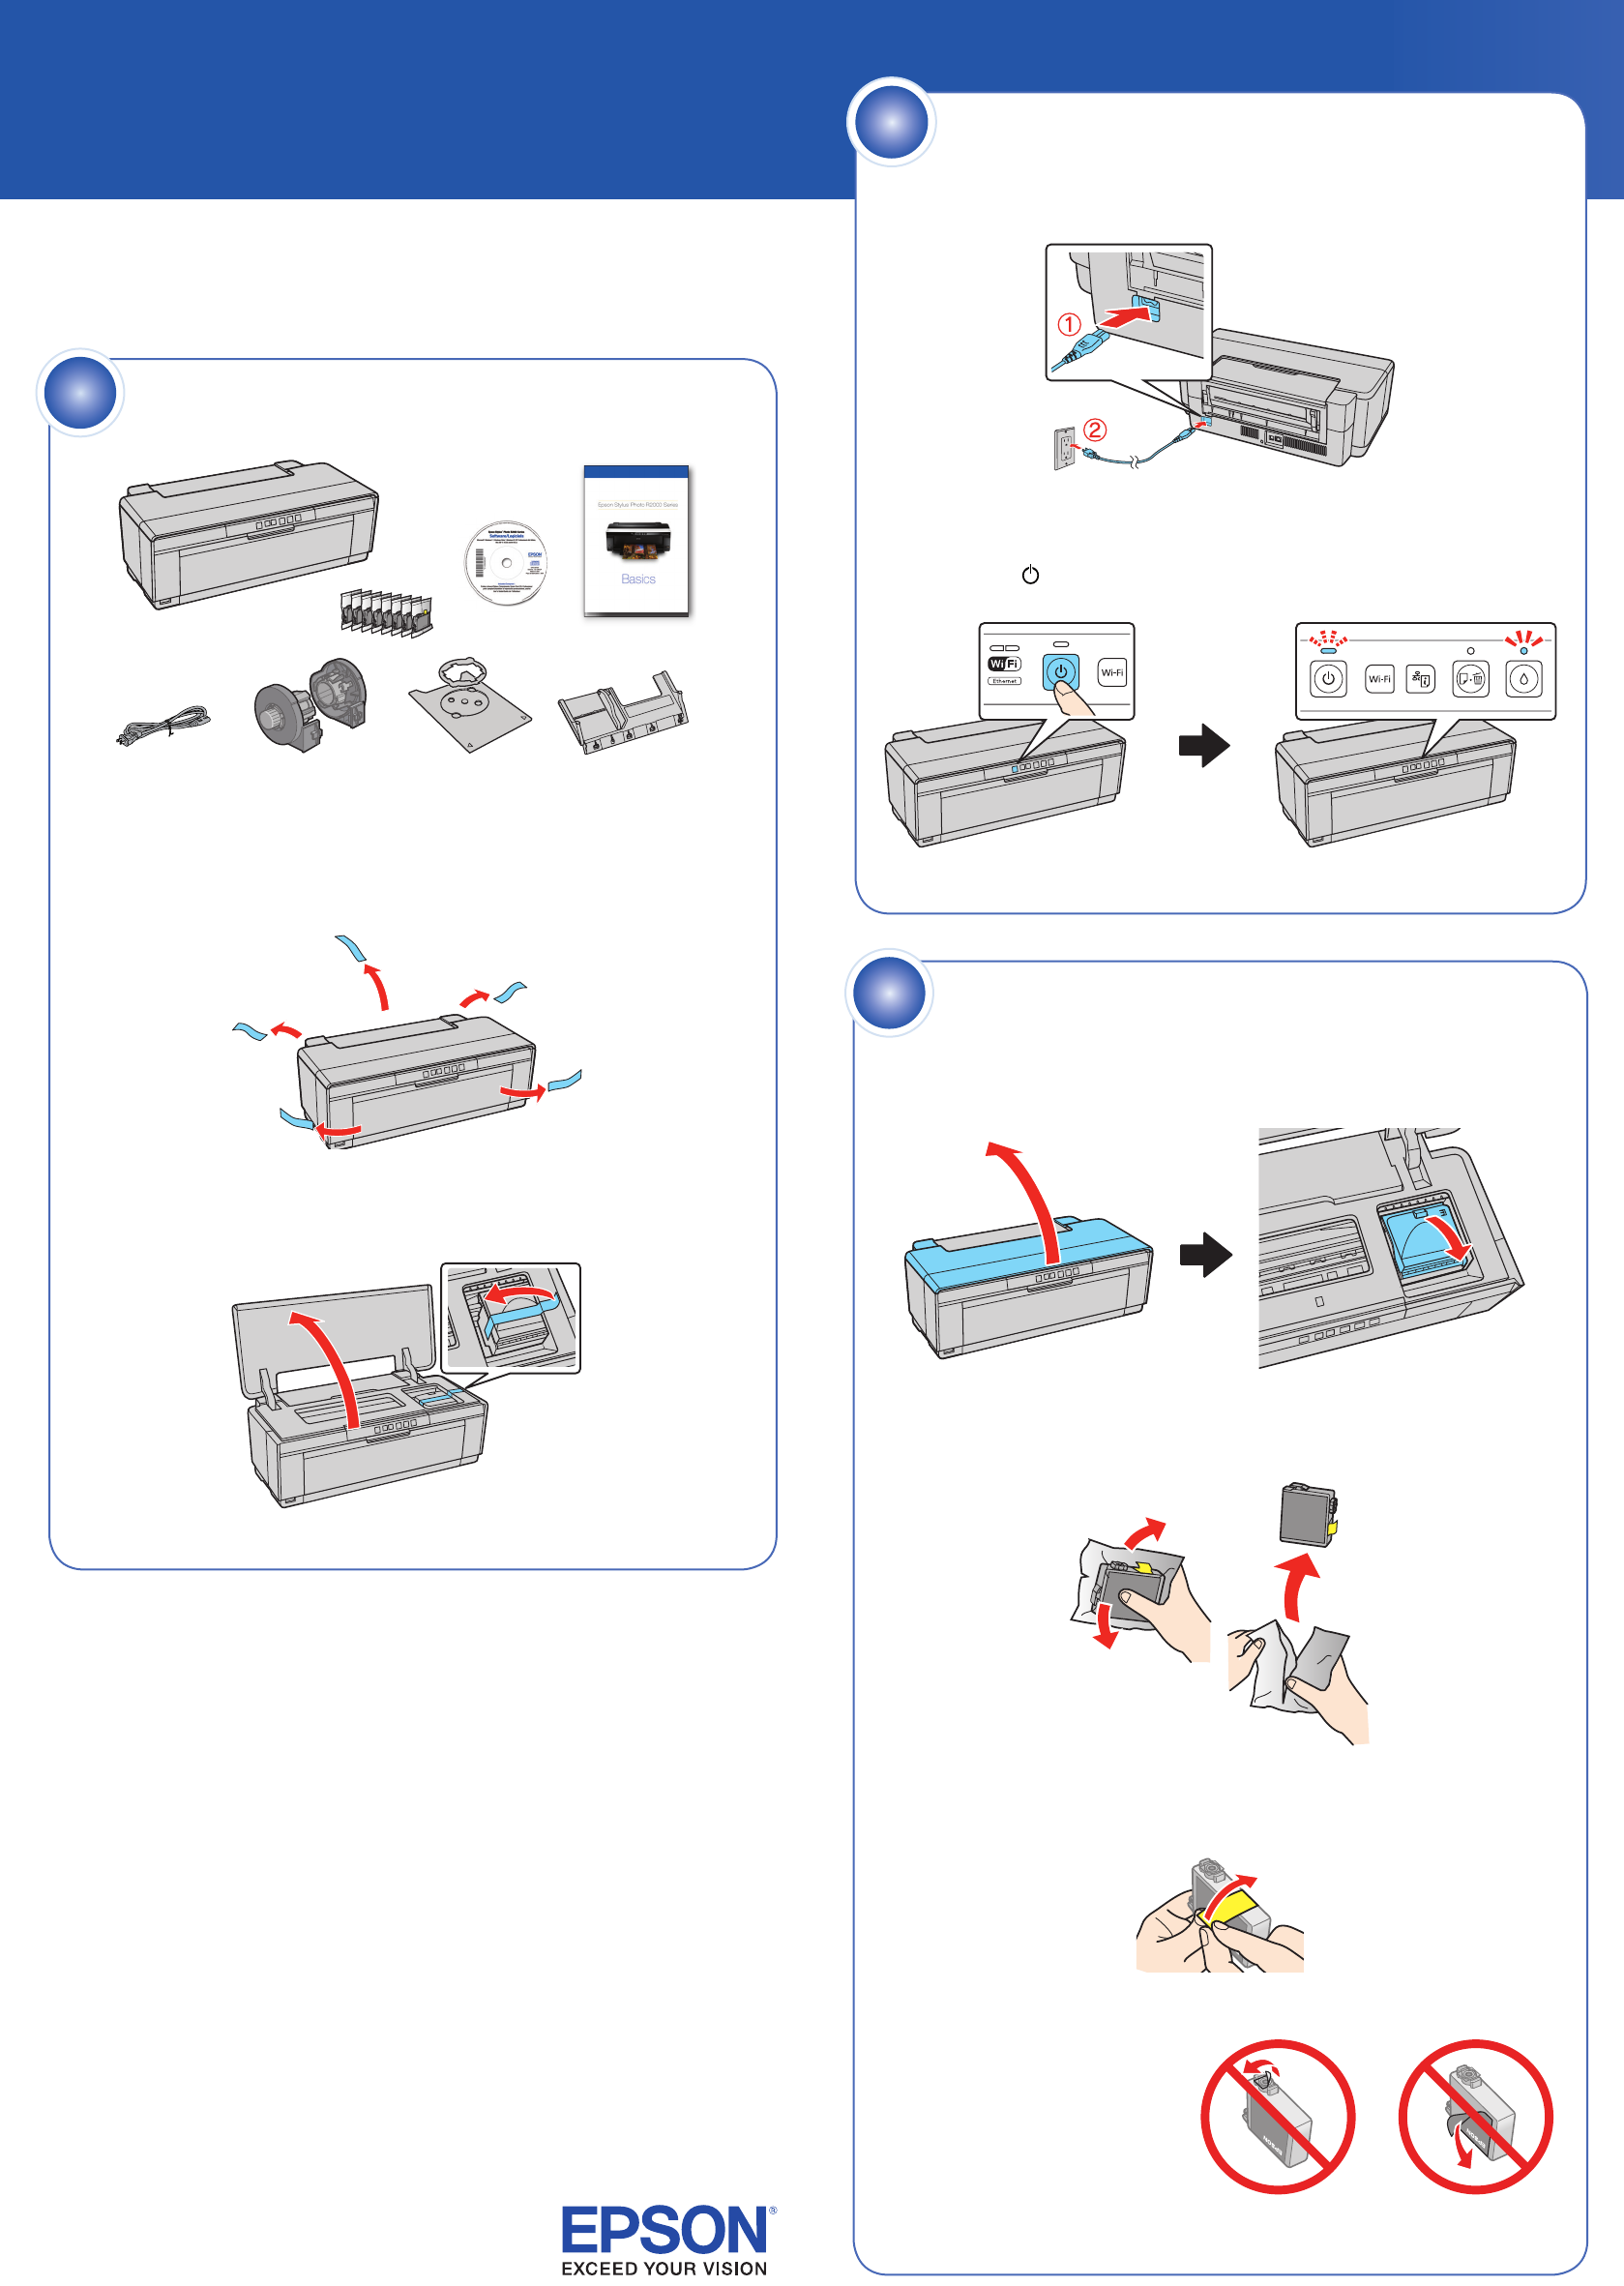
4 Insert the cartridges in the holder for each color.5 Press the cartridges down until they click.6 Close the cartridge cover, then close the print
4 Insert the cartridges in the holder for each color.5 Press the cartridges down until they click.6 Close the cartridge cover, then close the print
5 Turn on the printer so it can load the paper correctly.6 Insert one sheet of paper against the right edge, then slide the edge guide over. Note:
5 Turn on the printer so it can load the paper correctly.6 Insert one sheet of paper against the right edge, then slide the edge guide over. Note:
Verwandte Produkte und Handbücher für Drucken & Scannen Epson R2000

 (12 Seiten)
 (84 Seiten)
(19 Seiten)
(164 Seiten)
(84 Seiten)
(19 Seiten)
(164 Seiten)
 (108 Seiten)
© 2020, manymanuals.de. Alle Rechte vorbehalten. | 2.911 s |
 Manymanuals.com
 Manymanuals.de
 Manymanuals.fr
 Manymanuals.it
 Manymanuals.pl
 Manymanuals.cz
 Manymanuals.es
 Manymanuals-pt.com
Kommentare zu diesen Handbüchern