Epson PowerLite 76c Betriebsanweisung
Stöbern Sie online oder laden Sie Betriebsanweisung nach Datenprojektoren Epson PowerLite 76c herunter. Epson PowerLite 76c User`s guide Benutzerhandbuch
- Seite / 111
- Inhaltsverzeichnis
- LESEZEICHEN
- User’s Guide 1
- Important Safety Information 2
- Copyright Notice 2
- Trademarks 2
- Contents 3
- The Epson 7
- 8 Welcome 8
- Connecting to video sources 8
- Using the remote control 8
- Using Your Documentation 9
- Registration and Warranty 10
- Unpacking the Projector 10
- Projector Parts 11
- Additional Components 12
- Optional Accessories 13
- 14 Welcome 14
- Setting Up the Projector 15
- Positioning the Projector 16
- Other Installations 17
- Connecting to a Computer 18
- Connecting with the VGA Cable 19
- 20 Setting Up the Projector 20
- Source Search 20
- For details about using the 21
- Connecting to Video Sources 24
- Video jack 25
- Connecting an S-Video Source 26
- 28 Setting Up the Projector 28
- Comp button on the remote 28
- 30 Setting Up the Projector 30
- Projecting 31
- Turning On Your Equipment 32
- Projector Remote control 33
- Power button 33
- Selecting the Image Source 34
- If you’re using a PC laptop: 35
- Adjusting the Image 37
- Adjusting the Image Shape 38
- Adjusting the Brightness 39
- Correcting Computer Images 39
- Adjusting the Color Mode 40
- Adjusting the Volume 41
- Shutting Down the Projector 41
- Using the Remote Control 43
- Stopping Action 45
- Zooming Your Image 45
- Replacing the Batteries 48
- Fine-tuning the Projector 49
- Changing Menu Settings 51
- 52 Fine-tuning the Projector 52
- Adjusting Colors and Clarity 53
- High or 54
- Low brightness mode in the 54
- Sharpness 55
- Color Temp 55
- Color Adjustment 55
- Esc or Menu. Your settings 55
- Adjusting the Input Signal 56
- Auto button on the remote 57
- ■ Resize (video) 58
- ■ Keystone 59
- ■ Operation Lock 59
- ■ Pointer Shape 59
- ■ Brightness Control 59
- ■ Volume 59
- ■ Display 60
- ■ User’s Logo 60
- Direct Power 61
- Power button to turn 61
- Viewing Lamp Usage and Other 62
- Information 62
- Creating Your Own Screen Logo 64
- Setting a Password 66
- Reset All. To reset 69
- Reset option 69
- Reset option on the 69
- Maintaining and 71
- Transporting the Projector 71
- Cleaning the Lens 72
- Cleaning the Projector Case 72
- The projector is overheated 73
- Replacing the Lamp 75
- Don’t remove 76
- Resetting the Lamp Timer 77
- Solving Problems 79
- Using On-Screen Help 80
- ? Help button 81
- Macintosh OS X: 84
- Macintosh OS 9: 85
- The image is blurry 87
- There is no sound 89
- Solving Password Problems 90
- Computer 91
- (Component Video) 91
- Where To Get Help 92
- ■ Description of the problem 93
- Projection Lamp 96
- Remote Control 96
- Mouse Compatibility 96
- Dimensions 96
- Electrical 96
- Environmental 97
- Safety and Approvals 97
- Compatible Video Formats 98
- ■ Windows: 99
- ■ Macintosh OS X: 99
- ■ Macintosh OS 9.x: 99
- Technical Specifications 100
- Important Safety Instructions 101
- Remote Control Information 103
- FCC Compliance Statement 104
- Index 107 107
- Index 109 109
- 110 Index 110
Inhaltsverzeichnis
Epson® PowerLite® 76cMultimedia ProjectorUser’s Guide
10 WelcomeRegistration and WarrantyYour projector comes with a basic carry-in warranty and an international warranty that let you project with confide
100 Technical SpecificationsThe projector supports these monitor display formats:Mode Refresh Rate (Hz) ResolutionVGA EGA 70 640 × 350VGA—60VESA—72VES
101BNoticesThis chapter includes safety instructions and other important information about your Epson PowerLite projector.Important Safety Instruction
102 Notices Except as specifically explained in this User’s Guide, do not attempt to service this product yourself. Refer all servicing to qualified
Notices 103Remote Control InformationYou can operate the projector by remote control via a line-of-sight infrared (IR) receiver at the front and rear
104 NoticesFCC Compliance StatementFor United States UsersThis equipment has been tested and found to comply with the limits for a Class B digital dev
105IndexAA/V cable, 24 to 25A/V Mute, 45, 60, 64 to 65, 83, 89Accessories, 13 to ??, 93Adapters, Macintosh, 19Air filtercleaning and replacing, 73 to
106 IndexDocumentation, using, 9DVD player, connecting to, 24EElectrical specifications, 96Enter button, 47, 51 to 52Entering the password, 67 to 68En
Index 107Link21L setting, 61Living Room color mode, 40Logocreating, 64 to 65displaying, 65 to 67turning on, 60, 66 to 67Low brightness, 39, 75, 95MMac
108 IndexProjectoraccessories, 13 to ??, 93carrying case, 10 to 13, 78cleaning, 71 to 74disabling buttons, 59, 68distance from screen, 16, 95feet, adj
Index 109TTechnical support, 9, 92 to 93Temperaturelight, 81 to 82requirements, 97Theatre color mode, 40, 54Timer, lamp, 77 to 78Tint setting, 54Track
Welcome 11Save all packaging in case you need to ship the projector. Always use the original packaging (or equivalent) when you need to send the proje
110 Index
12 WelcomeAdditional ComponentsDepending on how you plan to use the projector, you may need additional components: To receive an S-Video signal, you
Welcome 13Optional AccessoriesTo enhance your use of the projector, Epson provides the following optional accessories: You can purchase screens, carr
14 Welcome
151Setting Up the ProjectorThis chapter tells you how to set up the projector and connect it to a computer or video source. You can connect up to thre
16 Setting Up the ProjectorPositioning the ProjectorBefore connecting the projector, you need to decide where to place it. If you’re setting up the pr
Setting Up the Projector 17Try to place the projector directly in front of the center of the screen, facing it toward the screen squarely. If the proj
18 Setting Up the ProjectorConnecting to a ComputerYou can connect the PowerLite projector to any computer that has a standard VGA or BNC monitor port
Setting Up the Projector 19Connecting with the VGA CableFollow these instructions to connect to your computer with the VGA cable that came with your p
2Important Safety InformationWARNING: Never look into the projector lens when the lamp is turned on; the bright light can damage your eyes. Never let
20 Setting Up the ProjectorConnecting with a VGA-5BNC CableIf your computer provides video output through BNC connectors, follow these instructions to
Setting Up the Projector 21Connecting a USB Cable for Remote Mouse ControlUsing the remote control as a wireless mouse lets you click through slide sh
22 Setting Up the ProjectorConnecting an External MonitorIf you want to see your presentation close-up as well as on the projection screen, you can co
Setting Up the Projector 23Playing Sound Through the ProjectorYou can connect a commercially available audio adapter cable to take advantage of the pr
24 Setting Up the ProjectorConnecting to Video SourcesYou can connect a DVD player, VCR, camcorder, laser disc player, digital camera, gaming console—
Setting Up the Projector 25Connecting a Composite Video SourceIf you’re connecting a composite video device, use a commercially available RCA A/V cabl
26 Setting Up the ProjectorConnecting an S-Video SourceIf your video source has an S-Video jack, you can use it to project a higher quality video imag
Setting Up the Projector 27Connecting an RGB Video SourceFollow these instructions to connect the projector to a video player or satellite receiver th
28 Setting Up the ProjectorConnecting a Component Video SourceIf your video source has component video connectors, you can use them to project a highe
Setting Up the Projector 29Playing Sound Through the ProjectorThe projector has a built-in speaker with a maximum output of 1 W. You can play sound fr
3ContentsWelcome . . . . . . . . . . . . . . . . . . . . . . . . . . . . . . . . . . . . . 7Getting the Most from Your Projector . . . . . . . . . .
30 Setting Up the ProjectorFor Stereo Mini-Jack Audio Output PortsSome video devices, especially camcorders, may have a stereo mini-jack audio output
312ProjectingOnce you’ve set up the projector, you’re ready to turn it on, adjust the image, and give your presentation. Although you can operate the
32 ProjectingTurning On Your EquipmentMake sure your projector and other equipment are set up and connected correctly, as described in Chapter 1. Then
Projecting 334. Turn on your computer or video source if you have not already. 5. Press the P Power button on top of the projector to turn it on. (You
34 ProjectingSelecting the Image SourceSelecting the image source lets you switch between images input from different pieces of equipment connected to
Projecting 35If you’re using a PC laptop: Hold down the Fn key and press the function key that lets you display on an external monitor. It may have a
36 ProjectingIf you’re using a Macintosh laptop with OS 9:You may need to set up your system to display on the projector screen as well as the LCD scr
Projecting 37Adjusting the ImageOnce you see your image, you’ll need to make certain adjustments: To focus or zoom your image, below. If the image i
38 ProjectingAdjusting the Height of Your ImageIf the image is too low, you can raise it by extending the projector’s front adjustable foot. 1. Stand
Projecting 39 If your image looks like or , you need to adjust the keystone correction value. Press the or buttons on the projector to correct
42 Projecting . . . . . . . . . . . . . . . . . . . . . . . . . . . . . . . . . . . . 31Turning On Your Equipment . . . . . . . . . . . . . . . . . .
40 ProjectingAdjusting the Color ModeYou may want to adjust the color mode to select a different setting that is appropriate for the image you’re proj
Projecting 41Adjusting the VolumeYou can use the buttons on the remote control or projector to increase or decrease the volume the projector’s built-i
42 ProjectingIf you want to turn the projector on again, press the P Power button.4. Press up on the blue foot release lever and lower the projector t
4333Using the Remote ControlThe remote control lets you access your projector’s features from anywhere in the room—up to 20 feet away. For example, yo
44 Using the Remote ControlControlling the Picture and SoundYou can use the remote control to select your source, temporarily turn off the picture and
Using the Remote Control 45Turning Off the Picture and SoundPress the A/V Mute button on the remote control to turn off the image and sound and darken
46 Using the Remote Control4. While the image is enlarged, you can: Use the pointer button to pan about. Press the E-Zoom button to zoom out. 5. W
Using the Remote Control 47Using the Remote Control as a Wireless MouseWhen you use the remote control as a wireless mouse, you can control your compu
48 Using the Remote ControlReplacing the BatteriesThe remote control uses two AAA alkaline batteries. Follow these steps when you need to replace them
49433Fine-tuning the Projector You can use the Menu button on the projector or remote control to access on-screen menus to adjust the image, sound, an
5Viewing Lamp Usage and Other Information . . . . . . . . . . . 62Using the Projector’s Security Features. . . . . . . . . . . . . . . . . 63Creating
50 Fine-tuning the ProjectorUsing the Projector’s Menu SystemThe six projector menus let you adjust and customize the projector features: The Image m
Fine-tuning the Projector 51Changing Menu SettingsUse the buttons on the remote control to access the menus and change settings. Follow these steps:1.
52 Fine-tuning the Projector4. After highlighting the option you want to adjust, use the pointer button on the remote control or left or right arrow b
Fine-tuning the Projector 53Adjusting Colors and ClarityThe Image menu lets you make adjustments to the colors of the projected image and fine-tune br
54 Fine-tuning the Projector3. Use the pointer button (or the up and down arrow buttons) and press Enter to select any of the following options: Col
Fine-tuning the Projector 55 Sharpness Sharpens or softens the image. Color Temp.Adjusts red and blue tones. A lower color temperature produces an i
56 Fine-tuning the ProjectorAdjusting the Input SignalAlthough the projector normally detects and optimizes the input signal automatically, you can us
Fine-tuning the Projector 573. Press Enter. Then use the pointer button (or up and down arrow buttons) and the Enter button to select any of the foll
58 Fine-tuning the Projector Video Signal (composite and S-Video)Leave this setting at Auto unless you are using a 60-Hz PAL system (select PAL60).
Fine-tuning the Projector 593. Press Enter. Then use the pointer button (or up and down arrow buttons) and the Enter button to set the following opti
6Dimensions . . . . . . . . . . . . . . . . . . . . . . . . . . . . . . . . . . . . . 96Electrical . . . . . . . . . . . . . . . . . . . . . . . . .
60 Fine-tuning the ProjectorSelecting Projector Setup OptionsUse the Extended menu to customize the way you set up the projector. You can configure th
Fine-tuning the Projector 61 ProjectionFront: Projector is in front of the screen.Front/Ceiling: Projector is in front of the screen, mounted upside-
62 Fine-tuning the ProjectorViewing Lamp Usage and Other InformationUse the Info menu to view information about the display settings of your computer
Fine-tuning the Projector 63 SourceDisplays the input source currently being projected. Input Signal (computer, RGB video, and component video)Displ
64 Fine-tuning the ProjectorIf you assign the projector a password, a screen appears requesting the password whenever the projector is turned on. If y
Fine-tuning the Projector 653. Use the pointer button (or the down arrow button) and press Enter to select User’s Logo.4. When you see a message aski
66 Fine-tuning the ProjectorSetting a Password 1. Press the Freeze button on the remote control for about 7 seconds until you see the Password Protect
Fine-tuning the Projector 67The countdown for the elapsed time begins as soon as you close the Password Protect menu. (You can check the elapsed time
68 Fine-tuning the ProjectorIf the password is not correct, you see the message Wrong password. Please try again. If you enter an incorrect password t
Fine-tuning the Projector 69Restoring the Default SettingsThe Reset menu lets you return most projector menu settings to their default values. It also
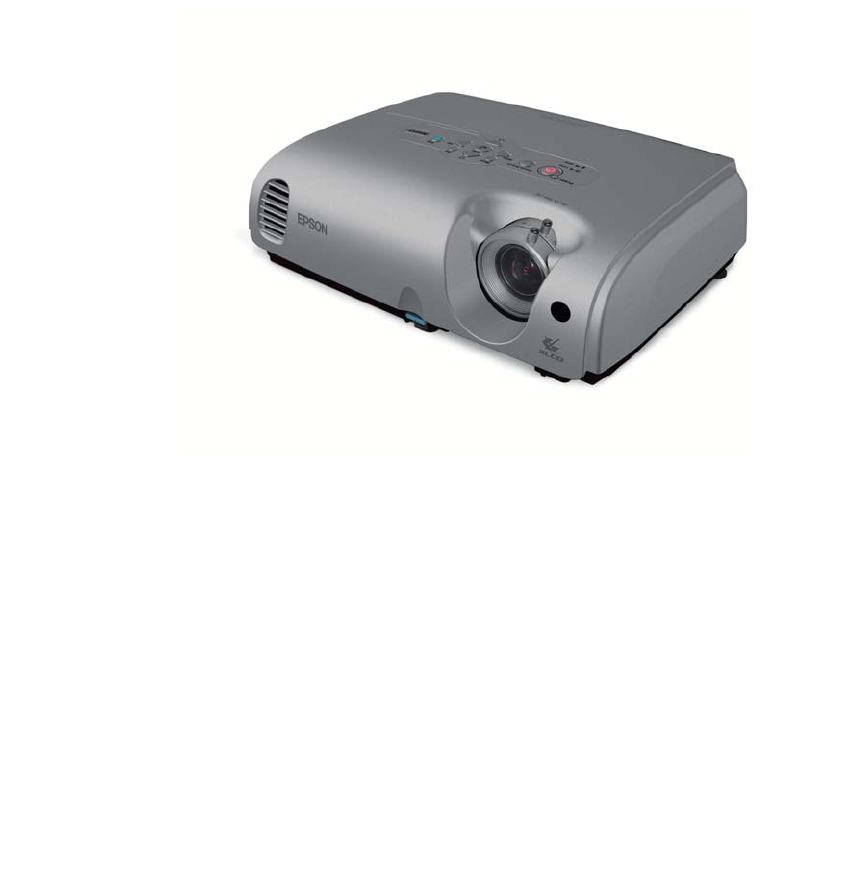
7-WelcomeThe Epson® PowerLite® 76c is an ultra-portable projector that offers 2000 ANSI lumens of brightness. From conference rooms to auditoriums, yo
70 Fine-tuning the Projector
715Maintaining and Transporting the ProjectorYour projector needs little maintenance. All you need to do on a regular basis is keep the lens clean. An
72 Maintaining and Transporting the ProjectorCleaning the LensClean the lens whenever you notice dirt or dust on the surface. Use a canister of comp
Maintaining and Transporting the Projector 73Cleaning and Replacing the Air FilterClean the air filter and air intake and exhaust vent on the bottom o
74 Maintaining and Transporting the Projector3. If you need to replace the filter, slide it off, as shown.4. Align the new filter carefully as you sli
Maintaining and Transporting the Projector 75Replacing the Lamp The projection lamp typically lasts for about 2000 hours of use (in high brightness mo
76 Maintaining and Transporting the Projector5. Use the screwdriver to loosen the two screws holding the lamp in place. (You can’t remove the screws.)
Maintaining and Transporting the Projector 779. Lower the lamp cover into place. (The opening should be almost covered, and the top of the cover shoul
78 Maintaining and Transporting the Projector4. Select Yes and press Enter.5. Press Esc to return to the main menu or the Menu button to exit the menu
796Solving ProblemsThis chapter helps you solve problems with your projector, and tells you how to contact technical support for problems you can’t so
8 WelcomeGetting the Most from Your ProjectorDepending on your presentation, you can take advantage of any or all of these options: Connecting to a l
80 Solving ProblemsUsing On-Screen Help If the image doesn’t look right or your audio isn’t working, you can get help by pressing the ? Help button on
Solving Problems 814. Highlight a solution (if this choice is available). Then press the Enter button to select the solution. Press the Esc button if
82 Solving ProblemsPowerlightLamplightTemperature light DescriptionRed Flashing red Flashing red There is an internal error in the projector. Turn t
Solving Problems 83Solving Problems with the Image or SoundNo image appears on the screen. Check that the power light is green, not flashing, and the
84 Solving ProblemsYou see a blue screen with the message No Signal displayed. Make sure the cables are connected correctly, as described in Chapter
Solving Problems 85If you’re using a PowerBook or iBook withMacintosh OS 9:1. From the Apple menu, select Control Panels, then click Monitors or Monit
86 Solving Problems Make sure your computer’s resolution setting is correct. Ideally, it should be 1024 × 768 to match the projector’s native resolut
Solving Problems 87 The video signal may be split between the computer and the projector. If you notice a decline in the projected image quality when
88 Solving ProblemsYou see vertical stripes or the image still looks blurry after trying the solutions in the previous section. If you’re projecting
Solving Problems 89 Check your computer display settings to correct the color balance. If the image seems dark, the lamp may be nearing time for rep
Welcome 9Using Your DocumentationYour documentation includes a Quick Setup sheet, warranty brochures, and an Epson PrivateLine® Support card. The Quic
90 Solving ProblemsSolving Password Problems You have forgotten the password. Write down the request code that appears in the Password Protect Releas
Solving Problems 91You have lost the remote control.You need the remote control to access many projector features. If you have lost it, you can order
92 Solving ProblemsWhere To Get HelpEpson provides these technical support services:Internet SupportVisit Epson’s support website at http://support.ep
Solving Problems 93Before you call, please have the following information ready: Product name (Epson PowerLite 76c) Product serial number (located o
94 Solving Problems
95ATechnical SpecificationsGeneralType of display Poly-silicon TFT active matrix with MLALens F=1.6, 18.4 to 22.12 mmResolution 1024 × 768 pixels (XGA
96 Technical SpecificationsProjection LampPower consumption 170 W UHELamp life About 2000 hours (High brightness);3000 hours (Low brightness)Remote Co
Technical Specifications 97EnvironmentalTemperature Operating: 41 to 95 °F (5 to 35 °C)Storage: 14 to 140 °F (–10 to 60 °C)Humidity Operating: 20 to
98 Technical SpecificationsCompatible Video FormatsYou can use any of the following video sources: VCR, DVD player, camcorder, digital camera, gaming
Technical Specifications 99Compatible Computer Display FormatsYou can connect the projector to a wide range of computers, including PCs and notebooks,
Verwandte Produkte und Handbücher für Datenprojektoren Epson PowerLite 76c
 (134 Seiten)
(131 Seiten)
(78 Seiten)
(189 Seiten)
(76 Seiten)
(98 Seiten)
(134 Seiten)
(131 Seiten)
(78 Seiten)
(189 Seiten)
(76 Seiten)
(98 Seiten)
© 2020, manymanuals.de. Alle Rechte vorbehalten. | 0.871 s |
 Manymanuals.com
 Manymanuals.de
 Manymanuals.fr
 Manymanuals.it
 Manymanuals.pl
 Manymanuals.cz
 Manymanuals.es
 Manymanuals-pt.com
Kommentare zu diesen Handbüchern